Don’t underestimate the power of your foam roller! Foam rolling is an effective self-myofascial release technique that can significantly enhance recovery, flexibility, and overall athletic performance. Today we are sharing our favorite way to give you a full body check in that only takes a quick 10 minutes. It’s so fast and easy with just 1 piece of equipment you’ll be feeling better and ready to go in no time. Join us as we target the spine, shoulders, and lower body in this 10 minute foam roller routine so you can recover faster and move more freely.
Our Foam Roller Routine Tips
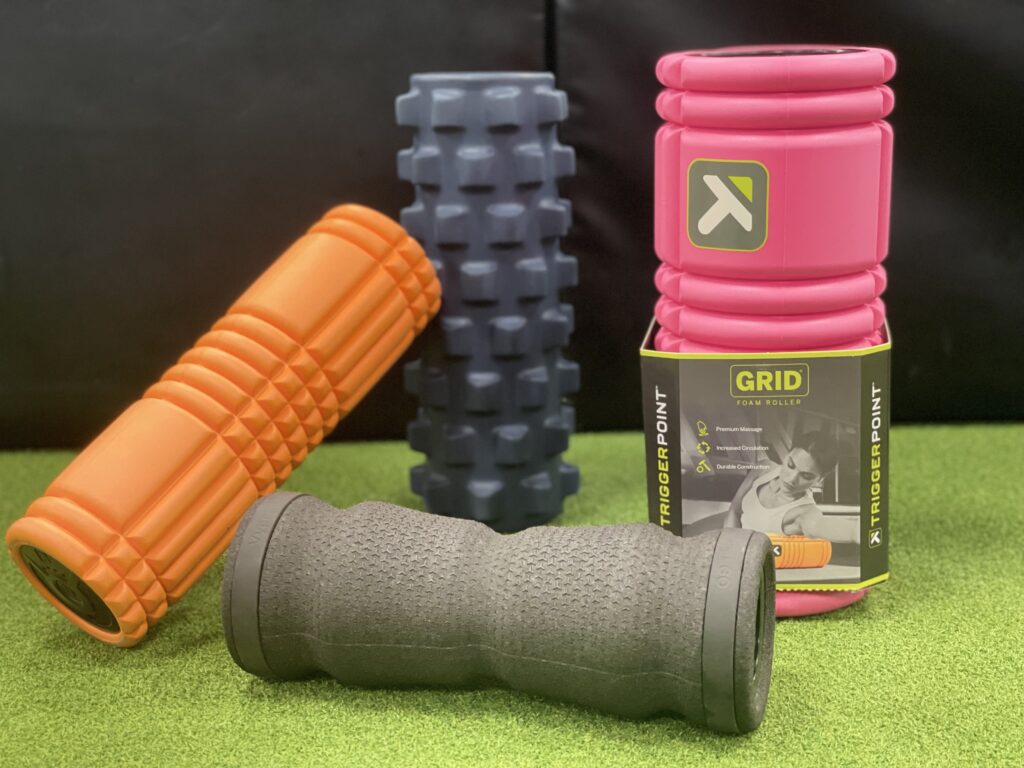
Before we get started, let’s go over some best practices for foam rolling. The idea foam roller has a hard core with a softer outer layer. That way it doesn’t compress over time. Our favorite is the Triggerpoint grid foam roller. You want to have plenty of space, so find an area where you can fully stretch out. You will be on the floor so if you don’t have a carpeted area I’d suggest grabbing a yoga mat if there’s one handy.
Benefits of Foam Rolling
Foam rolling offers numerous advantages for active individuals:
- Improved Muscle Recovery: By breaking down adhesions and knots in muscle tissue, foam rolling promotes blood flow, which aids in recovery after workouts.
- Increased Flexibility: Regular foam rolling can enhance your range of motion and overall flexibility, helping you perform better in your activities.
- Pain Relief: Foam rolling can alleviate muscle soreness and tension, reducing discomfort after intense physical activity.
- Injury Prevention: By maintaining muscle elasticity and reducing tightness, foam rolling can help prevent injuries associated with overuse.
Key things to remember for the foam roller routine are:
- You always begin by scanning an area. That means you don’t go directly to the painful spots but go through the entire muscle first (the spine is the only exception to this)
- After scanning you can do some active release techniques on 2 – 3 painful spots per muscle. This technique involves bending and straightening at the joint to move your muscle while applying pressure
- Having a good foam roller is key! If yours is old and too soft or so hard you’re tightening up you won’t get the right benefits!
Let’s get started!
Your 10-Minute Foam Roller Routine
1. Spine
Our foam roller routine begins with my absolute favorite spot, the thoracic spine. Place the foam roller at the base of your ribcage. This is not your lower back!! Then 1X1 slowly extend your spine over the roller. Lift your bottom and scoot down by an inch to work your way up. You have 12 vertebrae in your thoracic spine. Try to get them all!

Pro Tip: Pay attention to your rib cage. A very common mistake is allowing it to flare out as you extend backwards.
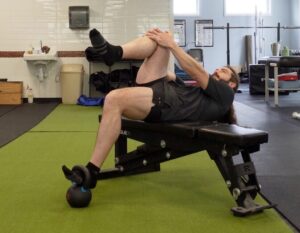
2. Lats


This technique targets the latissimus dorsi muscles, helping to improve shoulder mobility and relieve tightness. Place the foam roller just below the armpit and lean back onto our lats and some rotators. This can be a particularly rough spot for people, so proceed with caution! Gently roll back and forth in that small area. Once you’ve scanned for 1-2 mins find some extra tender spots and actively release them. You can do this by moving your hand behind you. This is going to help you improve your external rotation.
3. Glutes

To really get into the muscle, we like to sit on the foam roller with one ankle crossed over the opposite knee. Place most of your weight into the glute with the crossed ankle. Move back and forth over the glute area making sure to get the outer area too. This helps alleviate tension in the glute muscles, which can contribute to lower back pain.
Pro Tip: Don’t foam roll over bone! It’s never a good idea to roll over bone no matter what area you’re working on. Make sure you stop beforehand.
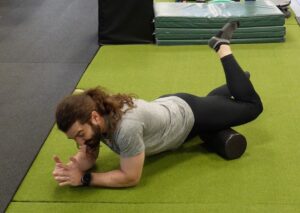
4. Quads

We see lots of people trying to kill 2 birds (quads) with one stone, but that isn’t the best way to target these muscles. We are going to do one quad at a time. Support your upper body with your forearms and roll from the hip flexor to the knee.
Pro Tip: It’s easiest to divide these longer muscles in half. Try focusing on the upper half for one minute before moving to the lower half for the second minute. Once you’re finished going over the entire muscle for 2 minutes, find a tender spot. Now actively release by bending and straightening at the knee.
5. IT Band
Moving right along, we are lying on your side with the foam roller under your outer thigh. Roll from the hip down to the knee. The iliotibial band (IT Band) can become tight, especially in runners, and rolling this area can relieve discomfort and improve knee alignment.

The same principles from the quads apply to this too! Divide and conquer. If you’re looking for active release, bend and straighten that knee!
6. Adductors

Proper setup for this one is important. You want to have your foam roller parallel to your body with your leg placed perpendicularly on top. Keeping both hips pointing towards the ground, shift your body weight to roll from the groin area down to the knee. This releases tightness in the adductor muscles, crucial for activities involving lateral movements.
7. Calf

Last but not least, we’re focusing on the calf. Sit on the ground with your legs extended, placing the foam roller under one calf. Use your hands to support yourself and roll in sections from your ankle to the base of your knee. Including the calf in your foam roller routine will help improve ankle mobility and can help prevent shin splints!
Pro-Tip: Keep your bum on the ground! Many of our patients say how hard this is for their upper body. The thing is, you don’t have to lift your entire body off the ground. We encourage you to use your hands to help you shift back and forth in small increments while leaving your glutes touching the ground. You’ll still get the same great foam rolling effect without the tightness in your shoulders!
Watch our 10 Minute Full Body Foam Roller Routine Video
What About The Hamstrings?
Many of you are probably wondering why we left out the hamstrings. It’s because sometimes the foam roller doesn’t quite get the job done for this big muscle. A better use of your time would be grabbing a lacrosse or field hockey ball and working through the area with that instead. Check out this other blog and video on how to heal your hamstring with these 3 techniques! Now, we’re not saying that it won’t work for everyone. If you’re particularly tight or sore you’ll still feel the effects of foam rolling!
Incorporating this 10-minute foam roller routine into your weekly fitness regimen can provide immense benefits for your recovery and performance. By doing a complete check on your full body you’ll help prevent injuries and enhance your overall physical health. If you have any questions about foam rolling or would like to learn more about how to incorporate these techniques into your routine, feel free to reach out to our team at the clinic. Let’s keep you moving and feeling your best!
🌟 Unlock Your Body's Potential with MDRx Full Body Mobility! 🌟
Are you ready to enhance your flexibility, reduce tension, and improve your overall movement? Introducing our 4-Week MDRx Full Body Mobility Program—a simple, effective routine designed for busy lifestyles.
What You Get:
– 10-Minute Daily Mobility Routines: Fit mobility into your day without the hassle.
– Systematic Approach: Focus on key areas for comprehensive improvement.
– Affordable Price: Just $15 for the entire program!
Why Choose MDRx?
– Boost Performance: Perfect for athletes and active individuals.
– Reduce Pain: Alleviate tension and prevent injuries.
– Increase Flexibility: Move freely and feel your best.
👉 Join the MDRx community today and transform your mobility! Click the link to get started!
ENROLL NOW and take the first step toward a more mobile, healthier you!