Essential Rotator Cuff Exercises for Early Recovery
If you’re recovering from a shoulder injury, one of the best places to start is with rotator cuff exercises. These exercises are the foundation of a strong, stable shoulder. Your rotator cuff muscles are key to everything from lifting your arm to reaching overhead. Keeping it healthy means keeping you doing what you love. Whether it’s playing tennis, lifting weights, or just reaching for the top shelf! Starting with the right moves can make all the difference in a successful recovery.
What is the Rotator Cuff?
Your rotator cuff is made up of four small muscles that surround and stabilize your shoulder joint. These muscles—supraspinatus, infraspinatus, teres minor, and subscapularis—work together to keep your shoulder moving smoothly. When one muscle isn’t working properly, it can lead to pain and even further injury. That’s why strengthening and stabilizing these muscles is crucial early in your recovery process.
Why Rotator Cuff Exercises Matter
When you’re just starting recovery, it’s easy to want to skip right to heavy lifting or intense stretches. But if your rotator cuff isn’t firing on all cylinders, your shoulder could feel unstable. That instability can lead to injuries, affecting everything from sports to daily activities. When your muscles work in sync, they create smooth, pain-free movements. That’s what we’re aiming for! Early on, the goal is to retrain your muscles and brain to work together. The right rotator cuff exercises will help rebuild the foundation for better movement and stability. This is crucial in preventing further injury as you progress in your recovery.
4 Key Rotator Cuff Exercises to Begin Your Recovery
These exercises are designed to be done with no weights, no fancy equipment—just you and your shoulder! That makes them perfect for the early stages of recovery. They focus on gentle, controlled movements. These beginner exercises help retrain your brain and muscles to work together. Let’s get into it:
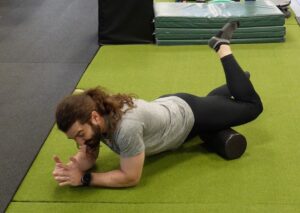
Chloe demonstrating poor shoulder placement
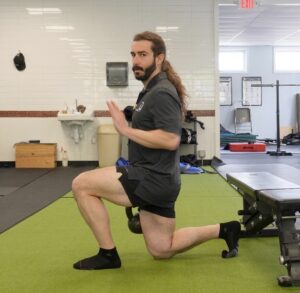
Chloe demonstrating proper shoulder positioning
Set Up For All 4 Exercises: When getting started it’s important to be standing with a neutral spine. You want to be sure that your shoulder is back in its socket. We don’t mean pinched!! We mean comfortably resting in its joint. For most of us that means we’ll need to pull it slightly back. If you can get in front of a mirror we highly suggest starting there so you can see what your shoulder is doing!
1. External Rotation
Bend your elbow to 90 degrees and keep it close to your side.
With your palm up (in a fist), slowly rotate your forearm outward, as if you’re turning a doorknob. This targets the muscles responsible for rotating your arm outward.
2. Flexion
Get back into the external rotation start position with your elbow bent
Slowly raise your arm forward, keeping the elbow bent not going above shoulder height
Then lower it back down. Keeping your elbow bent and only going to shoulder height helps take out other factors like weight and compensations. You’ll be able to target the muscles that count!
3. Abduction
Continue from the same external rotation start position
Keeping your palm up, lift your arm to the side to shoulder height, then slowly lower it.
It’s easy to let your elbow go high and your wrist dip – make sure you keep your wrist and elbow in the same plane! You can see in this photo to the right that Dr. Chloe’s elbow is high and her wrist is low.
Dr. Chloe demonstrating bad technique
Also beware of your shoulder taking over! It’s very common to begin this motion properly and end with your shoulder by your ear! Keep that shoulder down and in it’s socket.
4. Internal Rotation
With your elbow bent to 90 degrees, pull your arm back by your hip like yo’ure reaching your back pocket
Let your elbow go out slightly turning your bicep inward
Place your hand behind your back
This exercise can be particularly challenging! Don’t force the movement! If you’re having trouble begin by just bringing the arm back and starting internal rotation. Eventually when this is easy you can try and place your arm behind your back.
Start doing 2 sets of 10 of all 4 exercises. This may seem tedious and like you’re not doing anything but trust us! It’s so important. Making sure you have the proper range of motion combined with these movements being an afterthought are pertinent before moving on to more complex strengthening exercises. Once 2 sets of 10 is easy you can go to 3 sets of 10. Then incorporate a light dumbbell for the same exercises.
Watch The Rotator Cuff Exercises Video:
Why These Rotator Cuff Exercises Are Key for Early Recovery
These beginner rotator cuff exercises are simple, but effective. By focusing on small, controlled movements, you can rebuild strength and coordination in your shoulder muscles. This sets the stage for more advanced exercises later in your recovery journey. Remember, it’s not about lifting weights—it’s about teaching your muscles to work together again.
Starting with the right rotator cuff exercises early in your recovery can set you up for long-term success. These gentle movements help retrain your muscles and restore stability to your shoulder, so you can eventually return to the activities you love. Make these exercises part of your daily routine or warm up and watch your shoulder strength improve, step by step.
Bulletproof Your Shoulder in 4 Weeks: 15-Minute Daily Rehab for Strength, Stability, and Flexibility
Ready to take your shoulder rehab to the next level? Our 4-week systematic program is designed to boost flexibility, stability, and strength—perfect for those recovering from rotator cuff injuries or anyone looking to improve general shoulder health.
With targeted exercises and our exclusive Mobility Doc Method primer, you’ll bulletproof your shoulder in just 15 minutes a day. It’s simple, effective, and only $15. Don’t let shoulder pain hold you back—get stronger and move better today!
Receive updates when our blog, featuring the latest health and wellness information, is released along with other special events – No, we won’t send you things every day, but once or twice a week!