Whether you’re an athlete gearing up for your next challenge or someone seeking to enhance your everyday mobility, do we have a test for you! Imagine a world where your body flows seamlessly through every motion, where imbalances are addressed before they become setbacks, and performance and pain-free living go hand in hand. Today, we’re delving into the Functional Movement System’s inline lunge test. Join us as we discuss why this dynamic test could very well change the way you approach your next training strategy.
Understanding the Inline Lunge Test
Picture this: you’re about to embark on your favorite hike. The sun is shining, the birds are chirping, and your excitement is palpable. But wait, what’s that twinge in your hip as you take that first step uphill? Could it be an old injury acting up, or perhaps just a sign of the daily wear and tear we all experience? This is where the Functional Movement System’s inline lunge test steps onto the scene.
The inline lunge test isn’t just another checkbox on your fitness to-do list; it’s a window into the way your body moves. By breaking down complex movements into simpler components. This allows it to shed light on imbalances or limitations that might be lurking beneath the surface. If you’re a dedicated reader, you already know that movement quality is the foundation of optimal performance and injury prevention. Using this test to tease out issues can be your first step to preventing a much bigger issue!
Why This Test?
When you perform the inline lunge test, you’re putting your lower body—hips, knees, and ankles—through a sequence that mimics real-life movements. Your hip flexors, quadriceps, and the ankle all play a vital role in your ability to do almost everything. That is why this test is the perfect way to tease out multiple areas and issues you may be facing. It challenges all 3 joints we want to check in with for the lower body.

Think of it this way: just as a car needs proper alignment for a smooth ride, your body craves balance to move without hitches. A slight misalignment in one area can send ripples of dysfunction through your entire chain. This dysfunction can end up affecting your gait, posture, and overall movement efficiency. That goes for your whole body! Not just the lower body we are looking at today. Whether you’re a local runner conquering the Rail Trail or someone who’s focused on improving your daily mobility, the inline lunge test acts as a compass. It’s going to point out areas that might need a bit of recalibration.
Benefits of Incorporating the Test
But why should you bother incorporating this test into your fitness or therapy routine? Two words come to mind. Injury Prevention! Imagine being able to identify movement patterns that could potentially lead to larger issues and full blown injuries down the road.
For athletes, the inline lunge test is a must do. You can incorporate it before your season to see if you have any imbalances to focus on pre-season. It’s also handy to do mid-season as a checkpoint to make sure you’re still on the right track! It will show you areas for improvement, helping you fine-tune your training regimen allowing you to excel in your sport. That’s right! Excel… not have to deal with setbacks. But it’s not just for the pros. Whether you’re recovering from an injury or simply want to move pain-free through your everyday activities, this test is your trusty sidekick.
Check Out Our How To Video: Inline Lunge Test
This video led by Dr. John describes exactly what you need to do!
Other important tips to think about:
Don’t take steps: Moving your feet or “lunging” would add too many different variables and wouldn’t necessarily give you great results.
Use a line: Using a line either on a mat or a straight line on the floor will help make sure your feet are directly behind the other.
Use a Dowel: If you’re having trouble knowing if you’re staying upright, you can use a dowel (or broomstick) behind your back. You want to maintain contact with it!
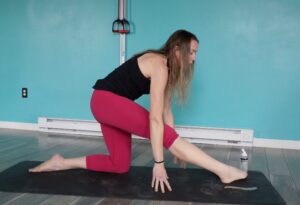
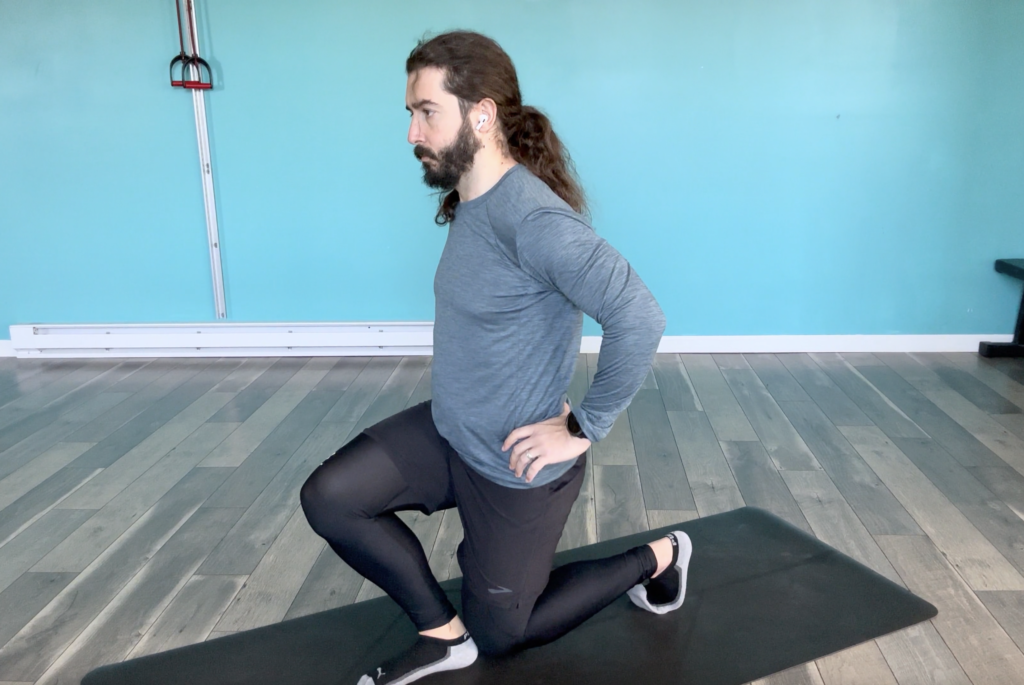
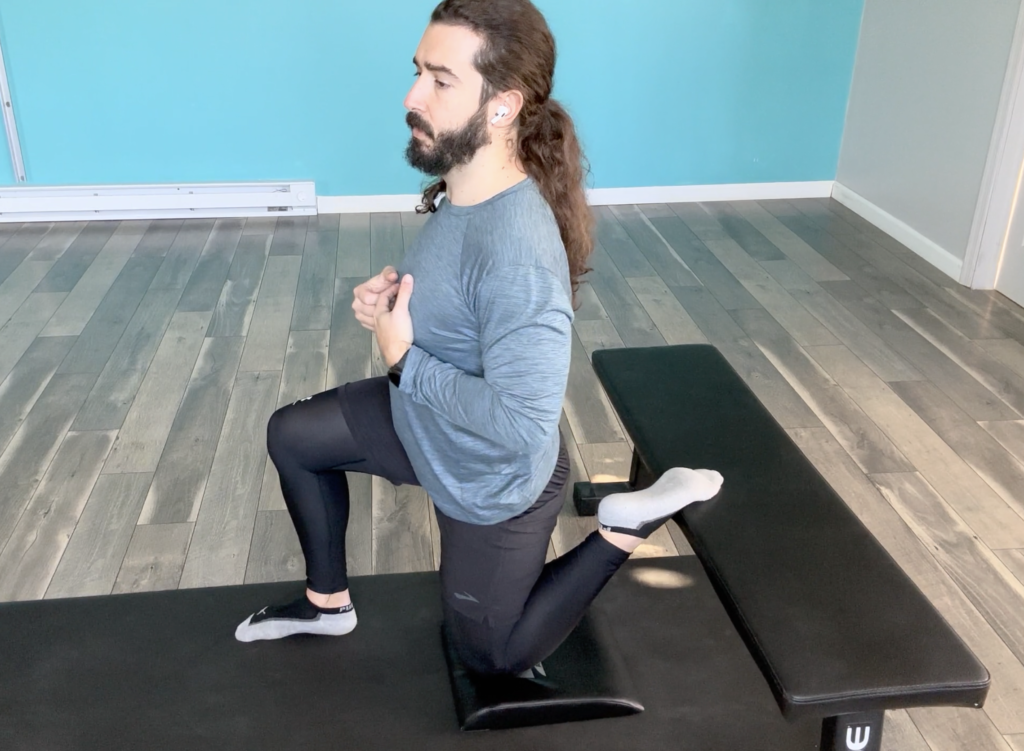
Corrective Exercises
If you are having big issues with any of the above scenarios, we highly recommend trying the following 3 corrective exercises. The couch stretch, the front foot elevated split squat, and the single leg glute bridge with elevated feet. You can use these 3 exercises in a Mobility-Doc method primer. What that means is you want to do all 3 exercises (in the order listed above) for 3 rounds circuit style.
Another good set of corrective exercises you can do, especially if your heel is coming off the ground, would be our ankle mobility primer.
Try It Yourself!
Remember, the inline lunge test isn’t just about checking boxes; it’s about crafting a better relationship between your body and movement. So, grab your curiosity and join us by trying the test and seeing where you may have asymmetries! If you find any trouble spots make sure to reference the videos we pointed out for corrective exercises and try again.
If you were wiggling around like a wet noodle you HAVE to check out our MDRx Hips. This is going to recalibrate and stabilize your hips to keep you strong! Or you can keep noodling around not sure which way the wind will blow you… the choice is yours. Take our advice… start the MDRx Hips Program today!