What makes a good warm up? We know that it takes more than just flexibility to get your body ready to do what you need. Flexibility is a component of our definition of mobility. Your mobility is the combination of how your body uses its flexibility, stability, and strength of a joint or body part. It’s about being strong and stable while you move through the proper range of motion. If you’re joining us a little bit late in the game I highly recommend you read last week’s blog. Over the last 2 weeks we have been slowly giving you the tools to make your own Primer. Today we are going to walk you through exactly how to choose the right exercises for you!
To create a good primer we know that it needs 3 exercises. It needs one for flexibility, one for stability and one for strength. Now how do we begin to choose what’s right for us? Let’s discuss what considerations need to be made before choosing your exercise and then go through an example of a good primer.
Considerations When Creating A Primer
We start with thinking about our sport or activity we want to prepare ourselves for. What part of our bodies does that sport have the greatest demand on? Our upper body? Lower body? Let’s give the example of running. We use our whole body to run, but a lot of the work is predominantly done with our legs. So we would begin to choose exercises that are geared towards the lower body.
After we pick the region we want to focus on, we also want to consider ourselves. Do you have an area you need to focus on more than another? Maybe you have a known asymmetry caused by an injury or bad habits. Either way, you want to choose which exercises are going to benefit you the most. We also want to choose exercises that have similar movement patterns to the sport or activity we are about to do. The more the exercises look like what you’re about to do, the more they will carry over into your sport! Let’s look at some lower body exercises that would benefit a runner.
Choosing The exercises
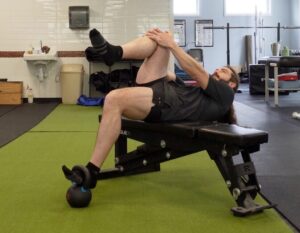
1 - Flexibility
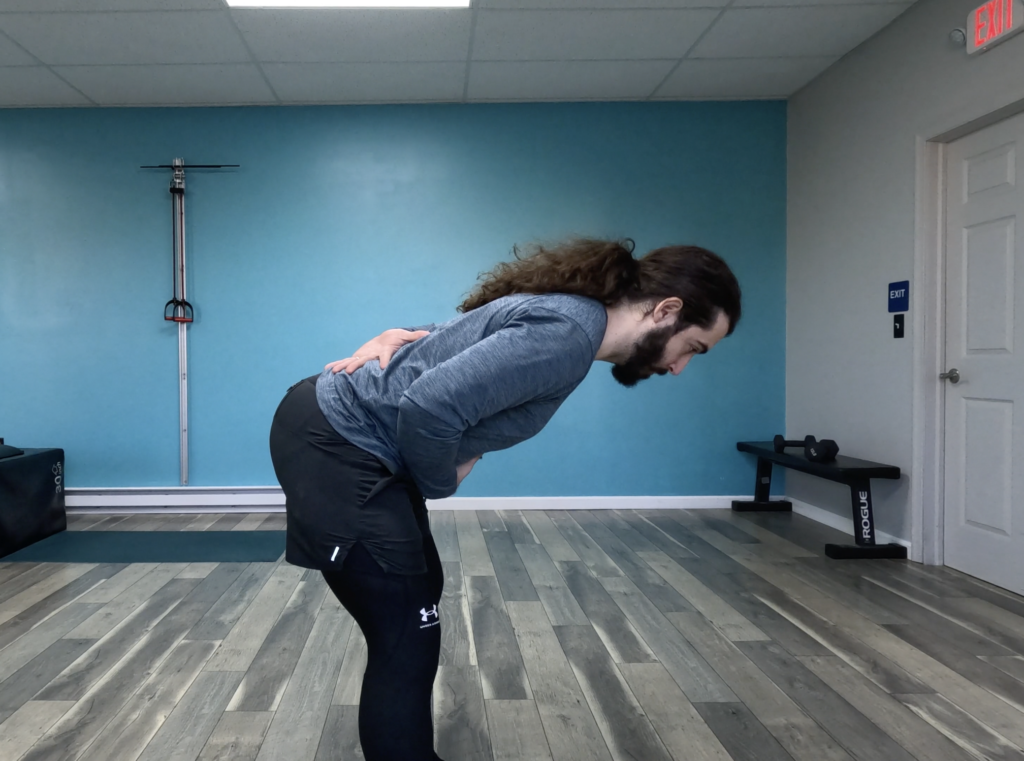
For the first exercise you want to choose something to impact your connective tissue. This would be either a stretch or foam rolling. For our running example I am choosing the pigeon stretch. This will get my connective tissue moving well in two areas. I like this stretch because it targets both the glute and hip flexor. The glute stretch comes from the leg in front of me and the hip flexor is the leg extended behind. Both of these areas are important for a runner and your stride length.
2 - Stability
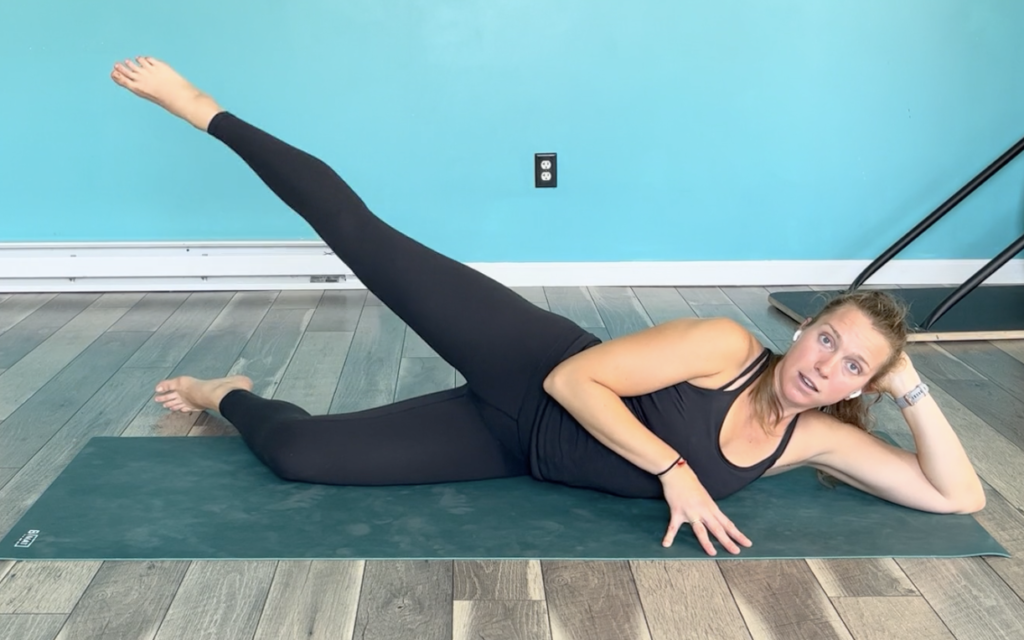
The second exercise is for our nervous system. That means it needs to have your muscle engage or activate. That way it will start sending messages from our brain to the muscle. Good examples of this would be something that has you using full extension of the joint and you need to squeeze your muscle when you hit the top or end range of the exercise before coming out. We don’t want it to be too hard but just enough to get your muscle working. For our runner I’m going to choose side leg lifts. This is going to stabilize the hip and activate the glute muscle. This activation is waking up my nervous system so that the muscle will be strong and ready by the time we start running.
3 - Strength
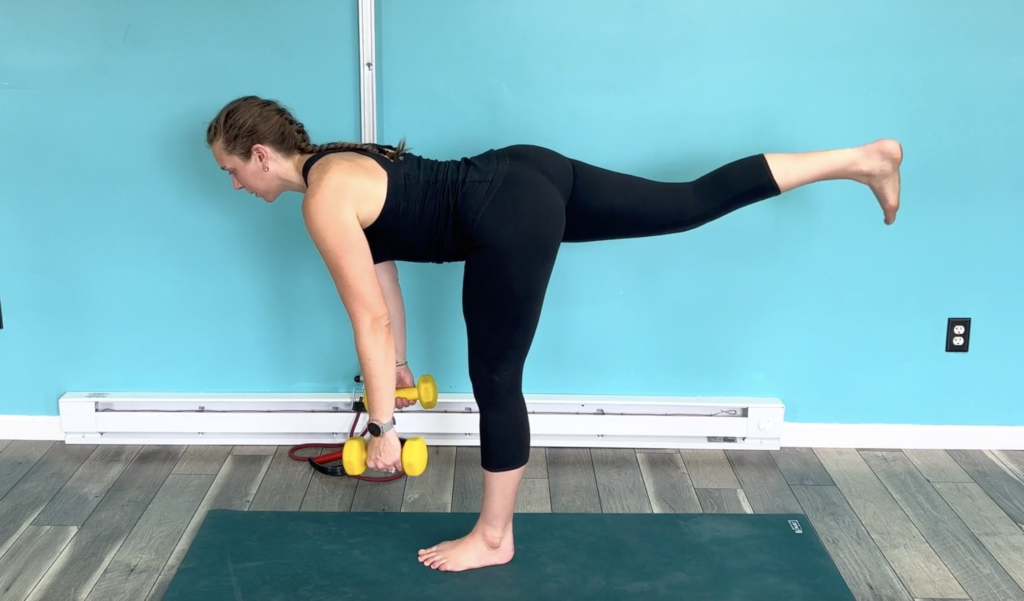
Lastly the strength exercise. This exercise combines both the flexibility and activation we got from the first two exercises. Our runner wants to keep using that hip as well as the range of motion we got from our stretch. We are going to use Single Leg Romanian Deadlifts. It can be done with or without weights depending on the level of difficulty you’re looking for. We also get lots of core and hamstring activation by doing a hip hinge.

Putting Your Primer Together
Now that we chose our 3 exercises it’s time to complete them circuit style. That means you’re going to do rounds of all 3 exercises. By doing this you will get more and more from each exercise by layering one after the other. Try this out for a few weeks and monitor how you’re feeling.
What makes these primers so unique is you can tailor them exactly to your needs so you can succeed. If something isn’t quite working, don’t be afraid to try to substitute with a different exercise. Just be sure you give it enough time to see results. Another thing that is important to note is that we try to use single side exercises. That is so you can balance your body and really pay attention to how the different sides feel. Understanding the differences you have from one side to the other is extremely important to help prevent injury and keep your body moving well.
Watch this Video for more detailed information on primers and more examples
It’s your turn! We are so excited to see what you will come up with for your own primer. We want to see it! Tag us @mobility_doc and share your primers on your favorite social media platform. We want to support you on your journey to move well so you can move often.
Join our MDFit Fam! We have a growing community of all stars that want to move well so they can move often! Try our most popular class MDFit HIIT with this free week trial!