Welcome back! If you read Part 1, you already know that strong hip flexors help prevent injury and can help you run faster. That being said, strength isn’t the whole picture. Your hip flexors don’t need to feel stiff, overworked, or just “off,” to need recovery. The problem? Most people are doing recovery work in a way that doesn’t transfer or they’re not doing the recovery work at all. Let’s break down the best tools to release hip flexor tension at home—and how to use them the right way.
The Missing Piece
When doing recovery work a lot of people just sit back and relax. They let the instrument “do the work” and aren’t actively participating. When you’re doing passive recovery work you’re leaving a whole lot on the table as far as results go. The real secret to unlocking more from your recovery work is actively participating. Active recovery is when you incorporate movement into the recovery work. Not sure what we mean? Well we’ll give you examples as we go through the 5 hip flexor recovery techniques below!
1. Massage Gun
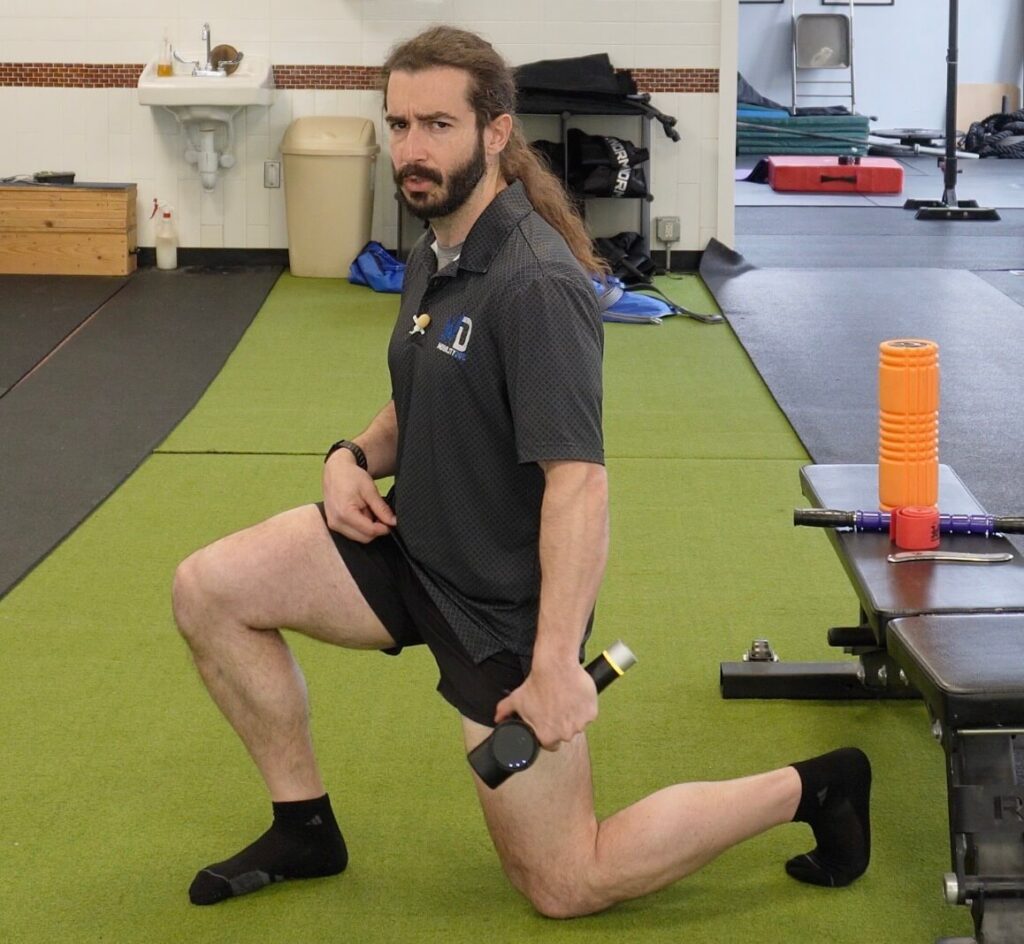
Massage guns are great and you can get results from passive work, but you’ll get even more if you’re active!
Combine it with a stretch.
How to do it:
- Get into a kneeling hip flexor stretch or couch stretch
- Apply the massage gun to the front of the hip/quad
- Keep a light glute squeeze and good positioning
- Let the muscle relax while it’s lengthened
Why this works:
You’re using the massage gun with your muscles in a stretched position. This allows you to get deeper and better release! We’re demonstrating using the Hypervolt by Hyperice
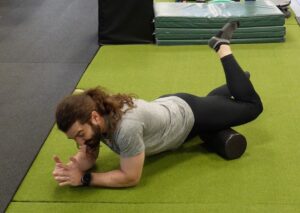
2. Muscle Scraping
Muscle scraping is one of our favorite ways to influence your soft tissue. It gets even better when you add range of motion to your scraping routine.
How to do it:
- Start muscle scraping along the hip flexor/quad
- Perform slow controlled split squats while scraping
- Continue for 20-30 seconds
Our favorite muscle scrapers are Sidekick Tools! It’s what we use on our patients every day. Our go to is the Echo. Check them out there!
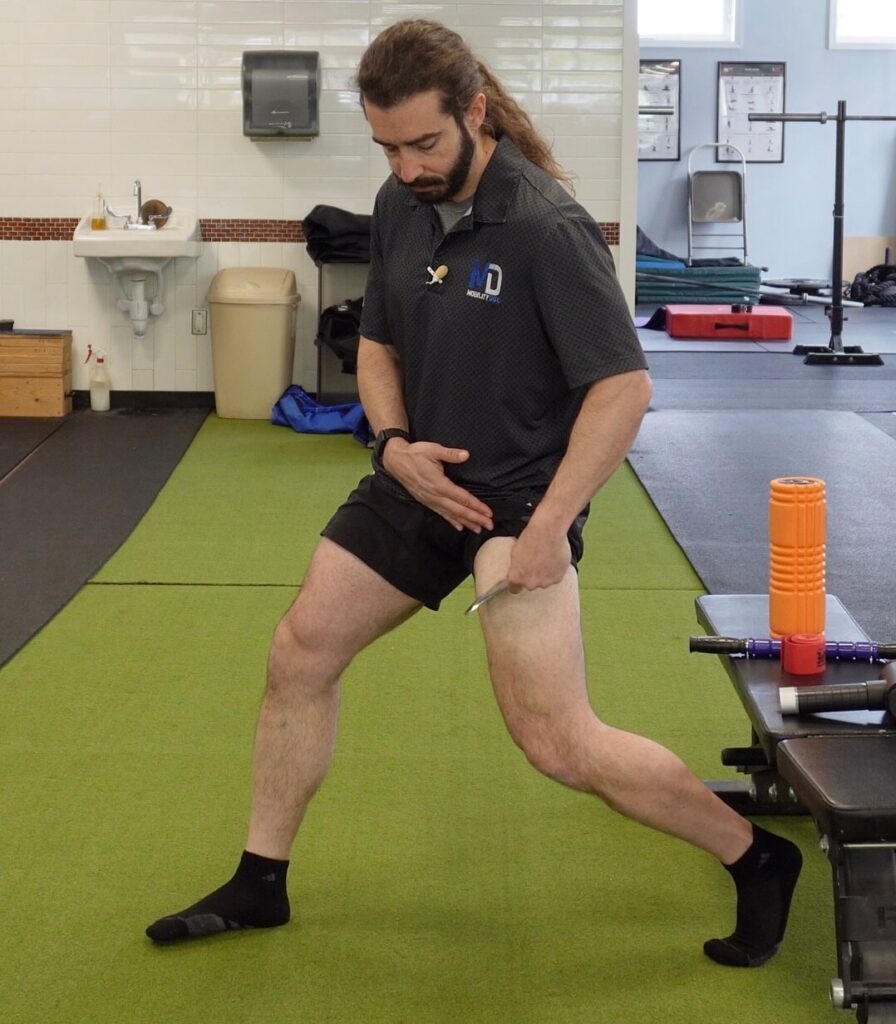
3. The Stick
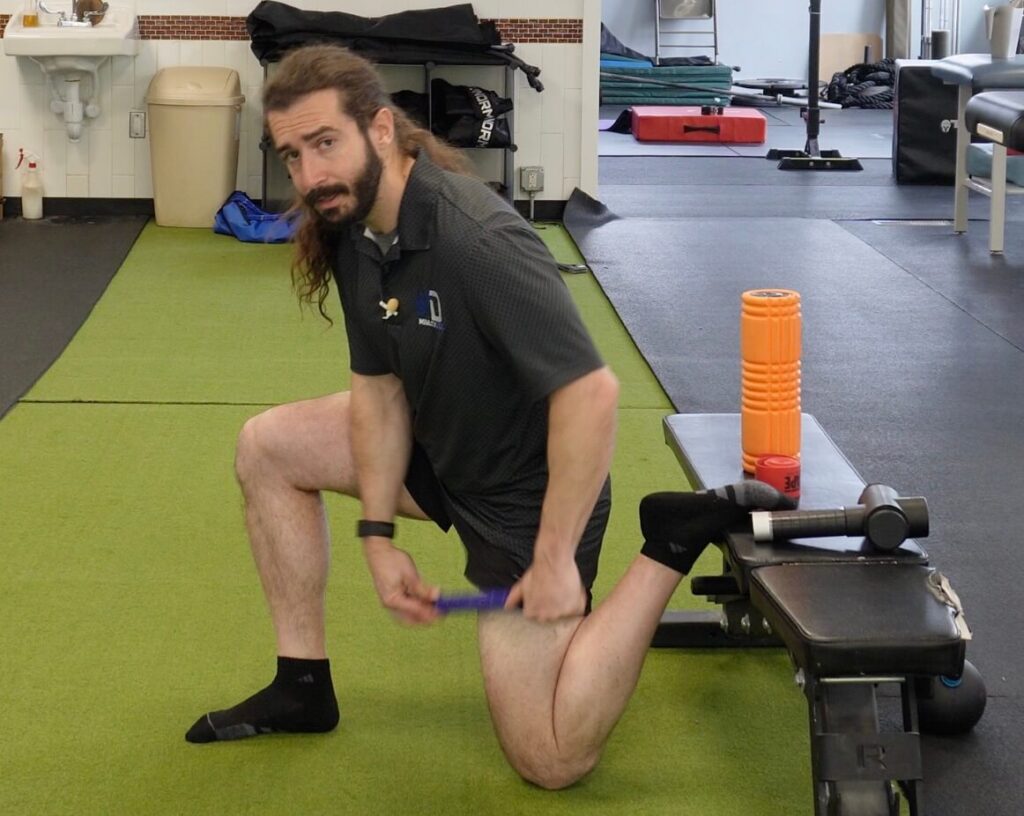
Using a stick or roller tool? Number one mistake we see? Not enough pressure!
How to do it:
- You want to apply strong pressure and roll in a downwards motion – this can cause problems because you’re hinged forward which means your muscles are shortened.
- Try getting into a couch stretch or kneeling hip flexor stretch to elongate the muscle before starting. That way you’re actively lengthening while using the stick to help alleviate tension.
- Use the stick on the quad and even the IT band for 20-30 seconds
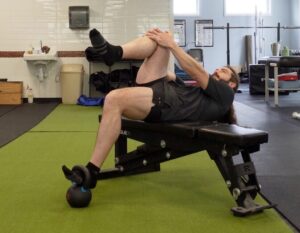
4. Foam Rolling

Foam rolling is another one of our most favorite ways to improve muscle health .
How to do it:
- Foam roll along the front of your hip/quad using your forearms to help
- When you find a tender spot, pause for a few seconds
- Then bend and straighten your knee – repeat for 6 reps per spot!
Why this works:
That small movement creates an active release, helping the tissue glide instead of just being compressed.
5. Muscle Flossing
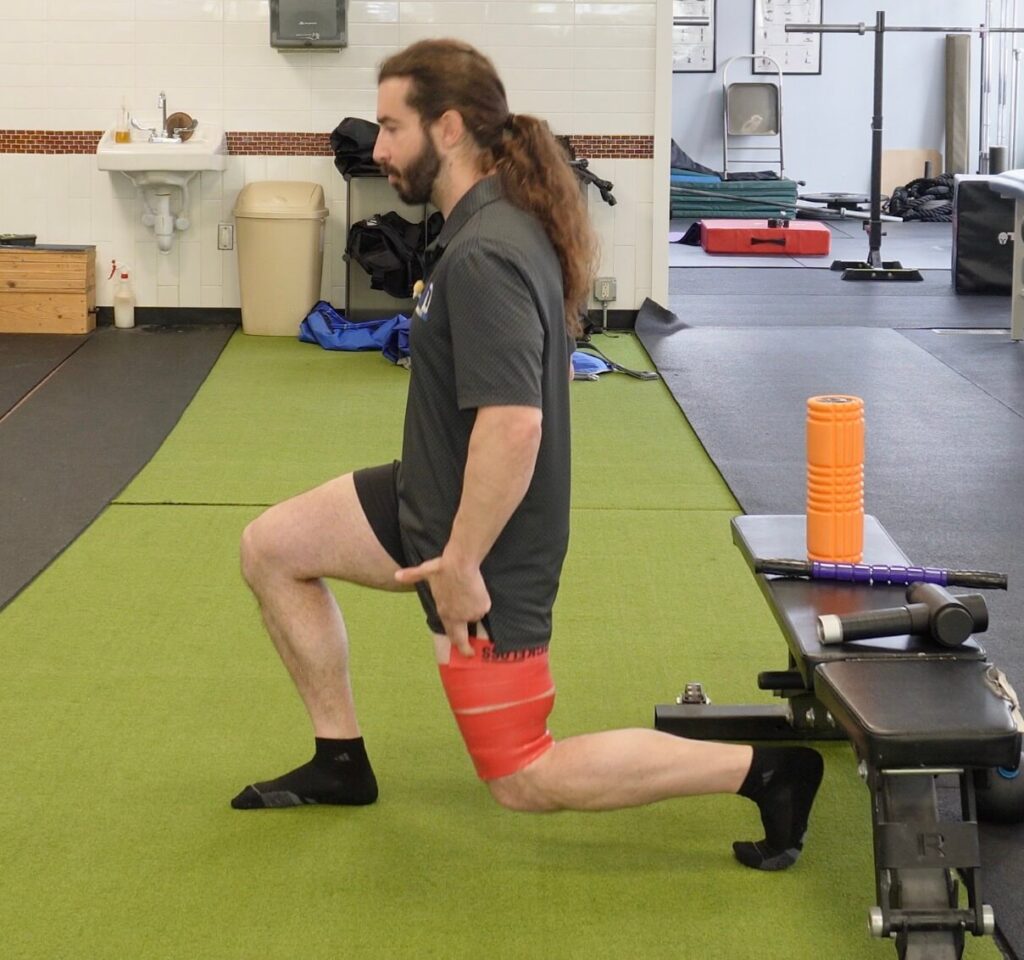
One of the lesser known techniques, but it gives amazing results!
How to do it:
- Wrap the upper quad/hip flexor with a floss band (from the knee up)
- Perform split squats while the band is on
- Keep reps controlled and smooth – don’t leave the band on for more than 90 seconds
Why this works:
The compression and movement combo helps improve circulation, tissue glide, and reprofuses to improve healing.
How to Use This in Your Routine
You don’t need to do all five every day.
Pick 1–2 methods and pair them with movement. You can do them:
- Before a run with lighter pressure and dynamic movement to warm up
- After a run with slightly longer holds and slow controlled reps for recovery
Keep it simple but most of all, stay consistent! These techniques aren’t going to give you results if you do them once a week or once every month. Do these 2-4 times a week and you’ll start seeing results.
Watch the How To Video!
Recovery isn’t just about loosening things up—it’s about helping your body to move better. So you can do what you love longer (and better). It’s so easy to not focus when you’re doing recovery work, but if you’re not moving with intention you’re not getting the results you should!
The only affiliate link in this blog is for Sidekick tools. If you’d prefer not to use it, no worries! We still highly recommend you check them out. Thanks for stopping by and reading about our 5 best tools to release hip flexor tension at home!